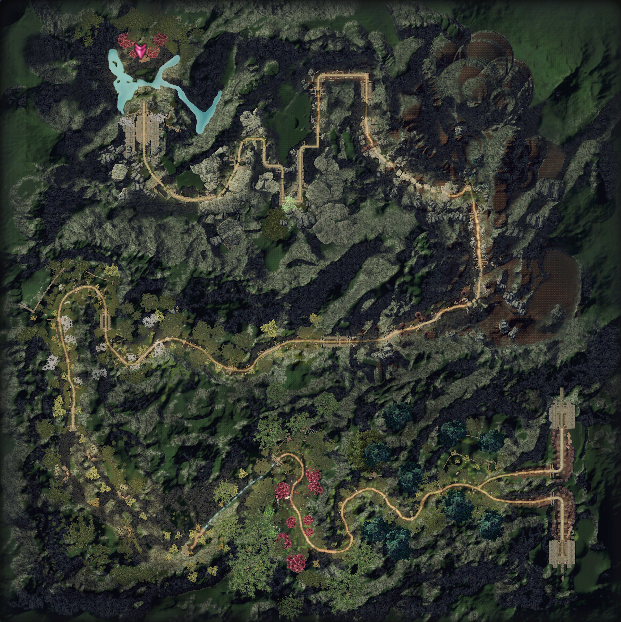
Map of Gogorunerk's Gauntlet
Gogorunerk's Gauntlet (Treasure Island of CourageKR/EU) is an event instance for players of level 76 and above, introduced in 5.8 as part of the Daeva's Dash event. The instance takes a group of three Elyos and another group of three Asmodians and makes them race against each other to pass the obstacles through the trail and reach the finish line before the opposite team.
It is similar to a battleground in the sense that players have to access it by applying through the same interface and that two teams complete against each other in order to win. However, there is no death or actual combat, and PvP is restricted to inducing the opposing faction members altered states to slow them down.
Access[]
The instance can be accessed at any moment while the event is active. Players of level 76 and above can apply using the Request Entry window, just like other battlegrounds. There are three options to apply as:
- New Group: Queues up the player to the list for matches that have not started already.
- Quick Entry: Queues up the player to the list for any incomplete team, whether the instance has started or not.
- Group Entry: (Group Leader only) Queue up together with the rest of the group the player is with.
Once two groups are matched against each other, players will be prompted to enter the instance.
Backstory[]
A Shugo explorer named <Gogorunerk> has discovered an island which he believes to be full of treasure. Legends speak of relics left behind by ancient heroes, and of vast riches amassed by pirates who once established an outpost on the island. But while the island's inhabitants have long since ceased, the numerous traps they left behind have not. <Gogorunerk> has traveled to the big cities to seek out brave adventurers who are willing to brave the many dangers found on the island and partake in the spoils it holds.
Transformations[]
At each team's starting point there will be four altars, each representing a different hero. Upon entering, players receive one ![]() <Soul Communion Stone> each, the item required to interact with the altars. Once the player has chosen an altar and interacted with it they will be transformed, and receive four skills and a mount on the fifth slot, as well as three
<Soul Communion Stone> each, the item required to interact with the altars. Once the player has chosen an altar and interacted with it they will be transformed, and receive four skills and a mount on the fifth slot, as well as three ![]() <Hero's Power>, which act as consumables required to use one the hero's special skill.
<Hero's Power>, which act as consumables required to use one the hero's special skill.
Each Hero will have its role and theme. The Shield will serve as a tank, withstanding attacks and increasing the whole group's speed, the Shoes will focus on sprinting ahead and focus on movement, the Trap and the Hook are mostly about hindering the opposing team's progress. Choosing a Hero will consume the ![]() <Soul Communion Stone>, disallowing the player from changing to other Heroes afterwards.
<Soul Communion Stone>, disallowing the player from changing to other Heroes afterwards.
| Hero Transformations | Abilities | |
|---|---|---|
| Shield of Ancient Hero | Skills | |
| Special Skill | ||
| Mount | File:Unicorn.gif Unicorn | |
| Shoes of Ancient Hero | Skills | |
| Special Skill | ||
| Mount | File:Tamed White Tiger.gif Tamed White Tiger | |
| Trap of Ancient Hero | Skills | |
| Special Skill | ||
| Mount | File:Executioner's Steed.gif Executioner's Steed | |
| Hook of Ancient Hero | Skills | |
| Special Skill | ||
| Mount | File:The Afterburner.gif The Afterburner | |
Walkthrough[]
Players spawn in one of the two Ancient Hero's Tomb, where they are given 90 seconds to prepare and select their hero transformation from the available types. Each player will also receive a summoning stone called ![]() <(Escape) Gogorunerk's Gauntlet>, used to create a teleporting statue, which will take them all the way back to the start in case they get stuck. Once the door opens players have 13 minutes to reach the finish line. Once the timer expires all players will be teleported to the finish line, where they will receive their rewards based on their score and can open the reward chests.
<(Escape) Gogorunerk's Gauntlet>, used to create a teleporting statue, which will take them all the way back to the start in case they get stuck. Once the door opens players have 13 minutes to reach the finish line. Once the timer expires all players will be teleported to the finish line, where they will receive their rewards based on their score and can open the reward chests.

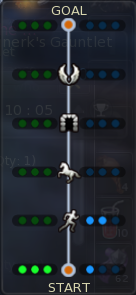
Progress Meter
The map is divided up in seven areas, each (excluding the start and finish) with its own theme and obstacles. The start of each area serves as a checkpoint, and awards points to a team each time one of its players reaches these locations.
The first player to reach a checkpoint will obtain the maximum amount of points for his/her team, with each subsequent player receiving diminishing returns. The checkpoints located towards the end of the course award the most points, and should be reached by as many people from one's own team as possible before the enemy can.
An overlay window on the right side of the screen will display the progress of both teams, showing the location of each dot (player) with regards to the checkpoints.
To incentivize players to keep trying Movement Speed buffs will appear behind the front runner as he/she makes their way along the course. A player can pass through these to receive an a temporary increase to their movement speed. Finally, if the player falls off the course they will respawn in front of the respective obstacle without penalty.
Ancient Hero's Tomb[]
- Theme: Running
- Obstacles: -
Once the doors swing open the team will face a long entryway with several stairs. The player's skills will become available shortly after entering. It is recommended to quickly use the [1] skill, as well as any other movement related skills, to speed ahead. Out of the cave the paths will converge, and the player's team will likely encounter the enemy team at the first checkpoint.
Pirate's Golden Slip (First Checkpoint)[]
- Theme: Running, Jumping
- Obstacles: Fences, Bombs
This is a simple hurdling race. Both teams will have to avoid the Fences they find across the track by jumping over them while also keeping the enemy team in check. In addition to fences, several exploding Bombs have been laid down through the field. Stepping on them will result in the player and nearby allies being stunned for a brief moment, delaying their progress.
The section will be over once the windstream is reached, which will transport players to the Blindwind Valley. It is recommended players glide against the invisible wall in the middle, making it easier enter the windstream. Failing to mount it will waste precious time due to the flight cooldown.

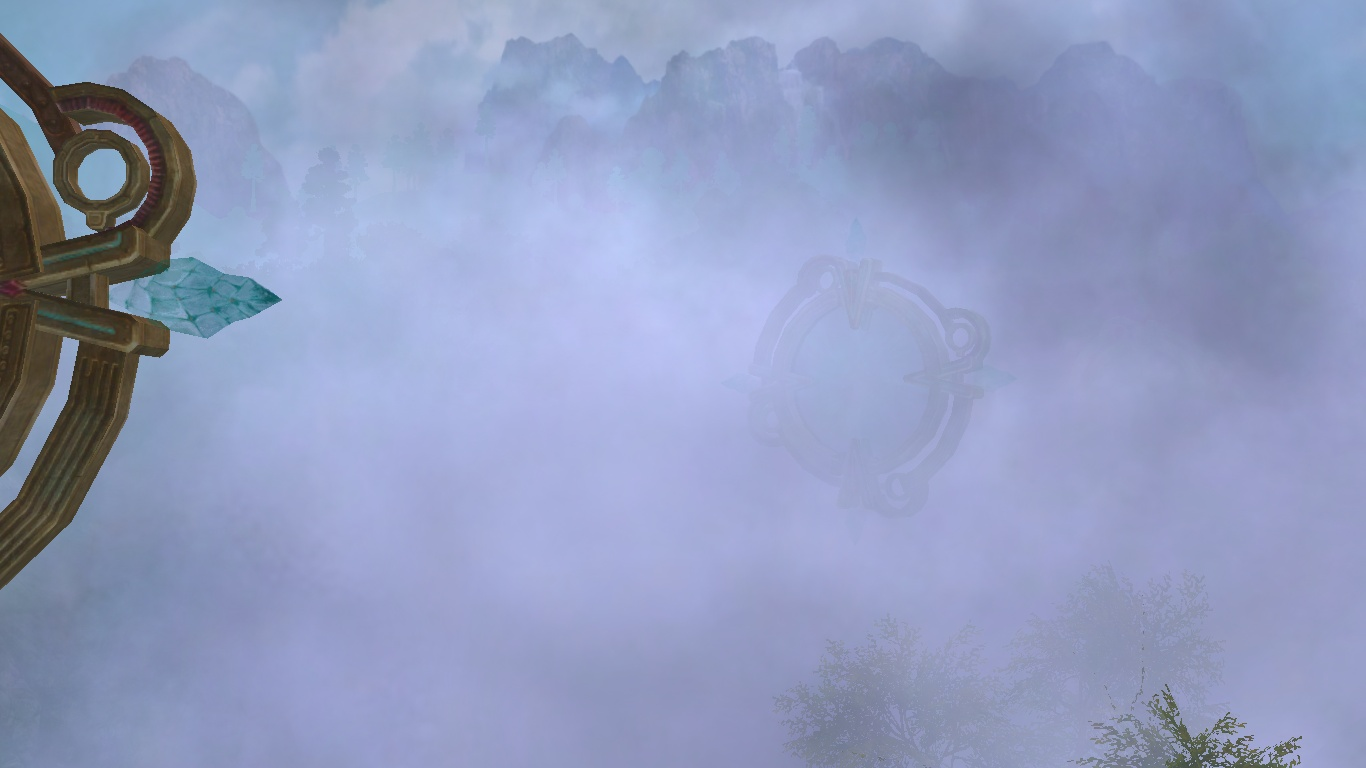
Blindwind Valley
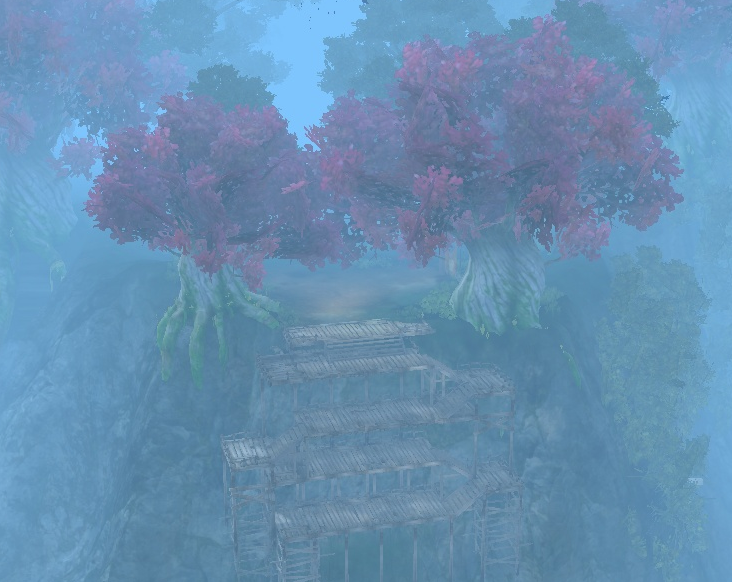
Blindwind Valley[]
- Theme: Flight
- Obstacles: Obscured Vision, Lightning Clouds, Walls
Out of the windstream players arrive in an area where flight is enabled. The goal here is to spread your wings and navigate through a section of the map shrouded in thick fog, greatly obscuring vision. This effort is further complicated by the presence of numerous Lightning Clouds, which will stun the player for 1.5 seconds upon contact, as well as several invisible walls if the player strays too far from the intended course. Flying too low will also result in the player being sent back to the start.
To safely traverse the area it is recommended to look for and stick to the various Flight Rings, which act as beacons for the proper path, and to make use of the transparent minimap. If the player has wings equipped that come with the Power Flight ability (Soar), they may use this ability to speed ahead.
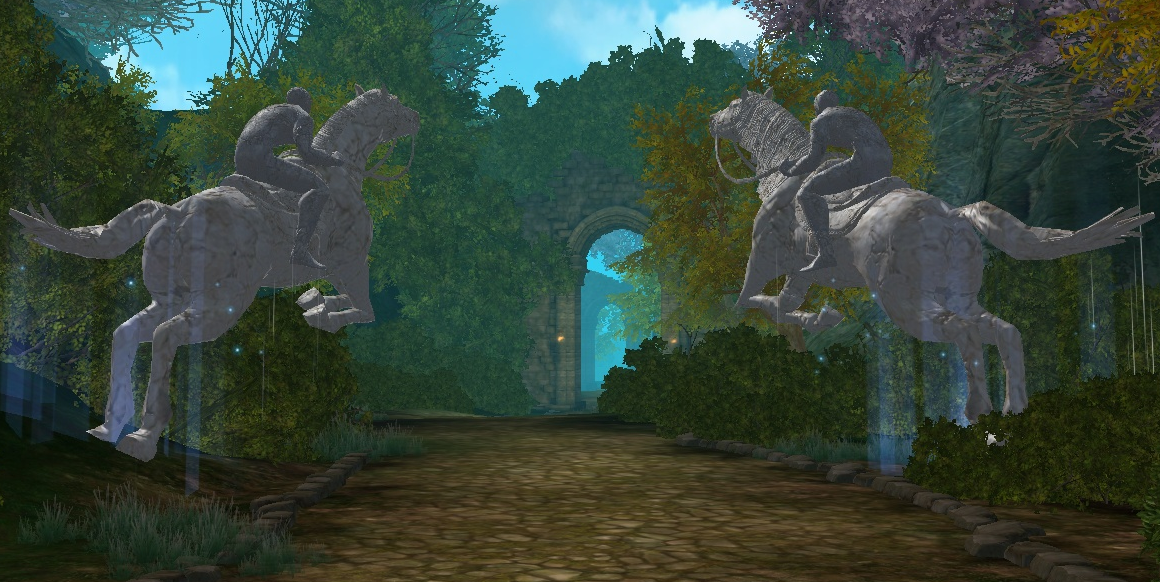
Towards the end of the course the fog will clear and the player will notice a landing platform and continuation of the ground level, to which they may glide down. Advance ahead to beyond the two statues on the road, which marks the second checkpoint and the start of the fourth area.

Hero's Advance Route
Hero's Advance Route (Second Checkpoint)[]
- Theme: Mount (Sprint)
- Obstacles: Fences, Curved roads
The Hero's Advance Route is a rather straightforward route. The player may use the mount provided to them here, and infinitely sprint to quickly make their way through the area. This effort will be complicated by the enemy team, as hitting a player with a skill will instantly force them to dismount in addition to inflicting the usual status effects. During the time the player is disabled, members of the enemy team will try to quickly board their own mounts and sprint ahead, while another will stay near the player to prevent them from boarding their own mount. Teams will need to find the right balance between speeding ahead and having others stay behind to keep the enemy team in check, and react quickly if they see an nearby enemy boarding their mount.
Fences are present in the latter half of the course, and can be jumped over while sprinting if timed well. Overjumping however will relocate the player a few meters back. At the end of the course the player will dismount as they reach the third checkpoint and start of the next area.

Smelly Mushroom Cave
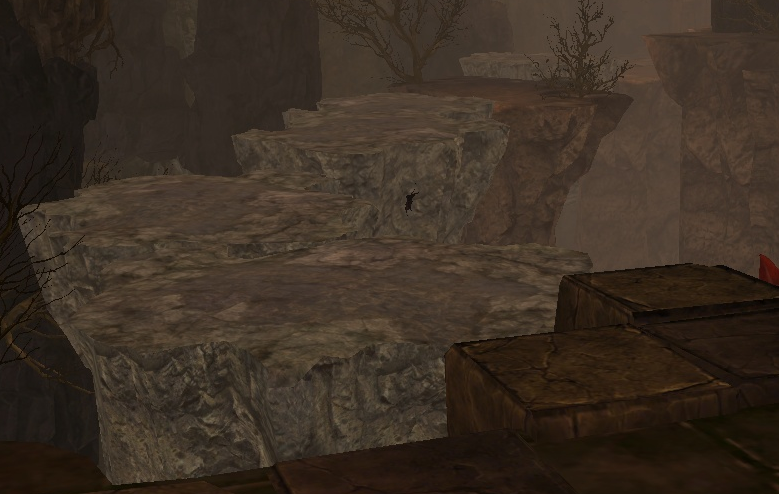
Smelly Mushroom Cave (Third Checkpoint)[]
- Theme: Running, Jumping, Gliding
- Obstacles: Poisonous Mushrooms, Spider Nests, Platforms
Things will get more challenging from this section onwards. The most common and threatening obstacles will be Mushrooms and Spider Nests. These poisonous mushrooms will create a green cloud of spores around them, which will reduce the movement speed of those who are touched by it. They can be avoided by jumping over them or sneaking past them from the sides. Meanwhile, stepping on Spider Nests will paralyze the player for a brief moment. What makes them especially challenging is their positioning.
The route will also feature several segmented paths and moving platforms, requiring swift jumping and/or gliding skills. Falling off will take the player back to the start of that set of platforms. At the end, the way will end abruptly, forcing players to use the nearby geyser to get them thrown up into the air and using glide to land on the entryway to the Crypt, the last section of the cave.

Crypt
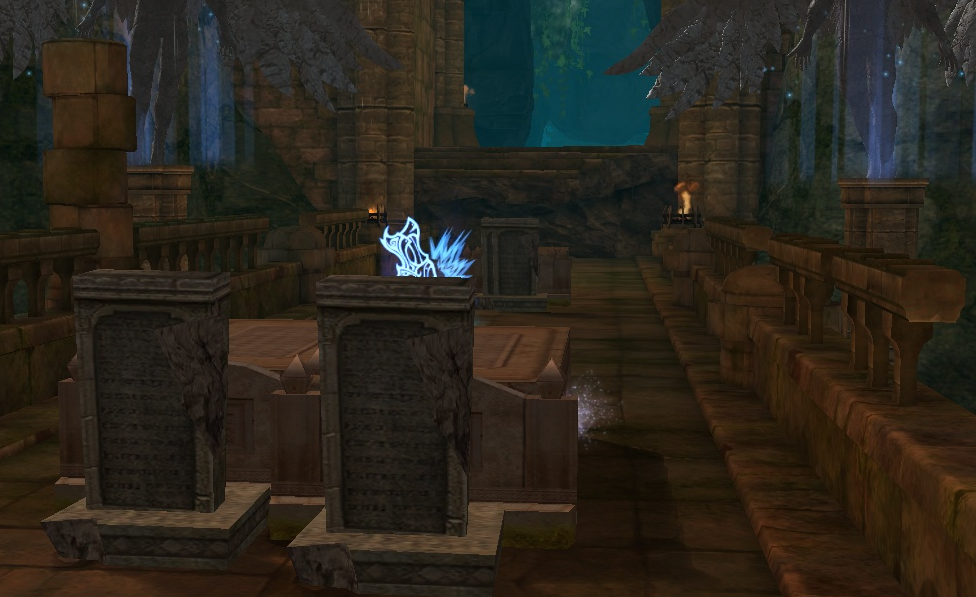
Crypt (Fourth Checkpoint)[]
- Theme: Running, Jumping
- Obstacles: Zombies, Graves, Poisonous Mushrooms, Spider Nests, Platforms
The second part of the cave, generally known as the Crypt, is the pre-final checkpoint and most difficult part of the course. It is also the final area the players will traverse before the finish line and the definite end of the instance. Much like the previous section, it will feature Mushrooms and Spider Nests (the latter being in much higher numbers).
The new obstacle are Graves, which will spawn in their locations once someone passes through. They are also solid, forcing the player to jump over or move around them. Graves will also spawn Zombies, which will attack players and reduce their movement speed if left close for too long. They cannot be targeted or attacked, but they will disappear after a small time. Since the Graves appear all of a sudden, the front runner will have a harder time avoiding them, and they will be aggroing most of the Zombies. Furthermore, zombies will respawn in their positions after a while alongside additional Graves, meaning that players who have fallen too far behind will face these obstacles as if they were the front runner.
Platform jumping will be a lot more common nearing the last portions of the section, with the presence of Spider Nests upping the difficulty. However, if the team succeeds the cave will open up into a valley. Simply jumping off and gliding into the Explorer Camp below will trigger the last checkpoint, and end the race.

Explorer Camp
Explorer Camp (Fifth Checkpoint)[]
Once the instance's timer ends, whether a team has reached the finish line or not, everyone will be teleported to this camp and the ![]() <Gogorunerk's Gauntlet Common Treasure Chest Keys> and AP will be distributed to team members in their respective amounts. <Gogorunerk> will also be present here, available to turn in the associated quest. Two chests will also be found here; <Common Treasure Chest> and <Ornate Treasure Chest>, which can be opened by their respective keys. Players may exit the instance by interacting with the rift next to <Gogorunerk> or by simply leaving the group.
<Gogorunerk's Gauntlet Common Treasure Chest Keys> and AP will be distributed to team members in their respective amounts. <Gogorunerk> will also be present here, available to turn in the associated quest. Two chests will also be found here; <Common Treasure Chest> and <Ornate Treasure Chest>, which can be opened by their respective keys. Players may exit the instance by interacting with the rift next to <Gogorunerk> or by simply leaving the group.
Quests[]
Quests are taken from and turned in to <Gogorunerk> in Azphel's Sanctuary in Norsvold and Ariel's Sanctuary in Iluma, as well as Pandemonium and Sanctum.
 [Event] Where the Ancient Hero Sleeps [?]
- [Event] Exploring the Gogorunerk's Gauntlet Once More [?]
Rewards[]
Note: Rewards may vary depending on the instalment of the event and the region it is being hosted on. Check the main website for the rewards listings.
The amount of AP is determined by how far participants have gone through the track by the finish time and whether they won or lost. The winning team will also be given six ![]() <Gogorunerk's Gauntlet Common Treasure Chest Key>, while the losing team gets three instead.
<Gogorunerk's Gauntlet Common Treasure Chest Key>, while the losing team gets three instead.
There will be two chests in the finish line; <Common Treasure Chest> and <Ornate Treasure Chest>. While in possession of the appropriate key, players will automatically receive a bundle with rewards once they interact with the chest. The former requires ![]() <Gogorunerk's Gauntlet Common Treasure Chest Keys> (obtained by the end of the race) and the latter
<Gogorunerk's Gauntlet Common Treasure Chest Keys> (obtained by the end of the race) and the latter ![]() <Gogorunerk's Gauntlet Ornate Treasure Chest Keys> (bought from the store, obtained from the instance's quests or, if lucky enough, from the other chest).
<Gogorunerk's Gauntlet Ornate Treasure Chest Keys> (bought from the store, obtained from the instance's quests or, if lucky enough, from the other chest).
Trivia[]
- <Gogorunerk'sGogorunerk> name is based on the phrase "Go, go, run!".
- The instance's rewards originally included GP, but it was removed.
- As with other 5.x content, this area contains many references to Katalam and Danaria, both in visual aspects (Jotun statues) and the soundtrack.
- Cheering and clapping can be heard when the player reaches the finish line.
- Transforming into a Hero will dress the character into its own skin item based on the one selected. Shield is File:Rose Duelist.gif Rose Duelist, Shoes is File:Dark Menace.gif Dark Menace, Trap is File:Raven General's Uniform.gif Raven General's Uniform and Hook is File:Shiver Me Timbers.gif Shiver Me Timbers.