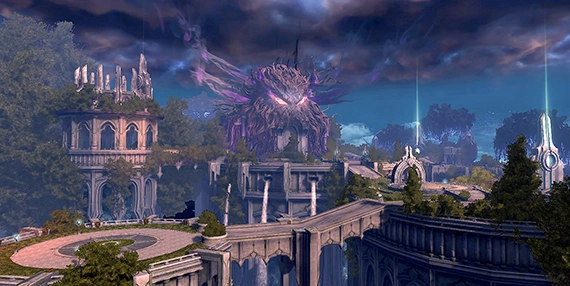
Cradle of Eternity (CoE), also known as Garden of KnowledgeKR/EU, was a group instance introduced with the 5.1 update. This mysterious ancient sanctuary holds primordial knowledge, but has been corrupted by a shadowy presence.
It was second instance of the three-part Artifacts of Eternity series, being the sequel to the Archives of Eternity, and the prequel to Trials of Eternity.
Cradle of Eternity was the only instance of the original three that was preserved in the 6.0 update as an adjusted version. With the 7.0 update this instance was removed from the game.
Map[]
")
")
Backstory[]
As the excursion into the Archives of Eternity was a success, a mysterious portal to the unknown opened up in the main chamber of the library. <Agent ViolaViola> (E)/<Agent PeregrinePeregrine> (A) sent an expedition squad to discover the secrets held by this new space. However, this proved to be impossible, as soldiers sent here were forced to retreat.
As the hero is asked to aid the guards in the intrusion, powerful enemies are found inside, but valuable allies are also met. The former tenders of the garden revealed how the deepest sections of the sanctuary holds an colossal ancient tree, called the All-Knowing Tree, which is believed to hold the information from the early time of creation. Through the years however, a corruption has slowly worked its way across the garden, taking over it. The origin of this; a being called <Typhon>, a devious and deadly snake, which even managed to pollute the mind of the former protectors of the gardens, claiming the base of the tree as his throne.
The Agent has already infiltrated the garden, and Daevas must present their aid to free the inhabitants and put an end to the ancient evil ruler.
Walkthrough[]
Serene Plaza[]
The group will zone in to the Advance Unit Refuge, a small platform within the first garden. Quest NPCs can be found here, as well as a Teleporting Stone Device as new sections of the map are opened. Depending on how much the group progresses through, they may teleport back to their last save point through this device without needing to walk all the way through (this device can only be used within the same run, as when the instance resets, so will this device).
In order to access the second garden, the group must defeat the first boss; the <Insightful Eye>, however in order to do that they must first access the Conqueror's Sanctuary, a separate chamber only unsealed when the <Fallen Jotun Warrior>, found guarding frontal door to the chamber, is killed. By going to the Conqueror's Sanctuary and interacting with the door they may access the chamber, starting the encounter immediately.
Conqueror's Sanctuary[]
During the encounter, the <Insightful Eye> will make use of a variety of attacks, most related to movement. They include; ![]() <Threatening Strike> (dealing damage on a target and others around the primary target),
<Threatening Strike> (dealing damage on a target and others around the primary target), ![]() <Breathtaking Look> (dealing damage in a straight line),
<Breathtaking Look> (dealing damage in a straight line), ![]() <Explosive Bolt> (reducing movement speed of a target and the ones around it),
<Explosive Bolt> (reducing movement speed of a target and the ones around it), ![]() <Severe Turbulence> (a cone-shaped AoE),
<Severe Turbulence> (a cone-shaped AoE), ![]() <Nervesnap Wave> (reducing movement speed of nearby targets) and
<Nervesnap Wave> (reducing movement speed of nearby targets) and ![]() <Lightning Strike> (paralyzing a target).
<Lightning Strike> (paralyzing a target).
However, its most dangerous feature is spawning four <Magic Towers>, each on one corner of the platform. There are three waves of these, and will take place depending on the HP of the boss and the DPS of the players. While the <Magic Towers> are present, the <Insightful Eye> will receive the ![]() <Unbreakable Defense> shield buff, making it invulnerable to damage. Due to how hard these secondary mobs hit, it is best to eliminate them instantly, and pop defensive buffs if needed. Additionally, from time to time,
<Unbreakable Defense> shield buff, making it invulnerable to damage. Due to how hard these secondary mobs hit, it is best to eliminate them instantly, and pop defensive buffs if needed. Additionally, from time to time, ![]() <Typhon's Pollutant> will go off, lighting up certain tiles on the platform, which after a few seconds will explode, dealing damage on people standing on them. This can be countered by moving to the tiles which do not light up.
<Typhon's Pollutant> will go off, lighting up certain tiles on the platform, which after a few seconds will explode, dealing damage on people standing on them. This can be countered by moving to the tiles which do not light up.
Having defeated the <Insightful Eye>, the group may loot its body for a chance at enchantment stones. The way out of the Conqueror's Sanctuary will be unlocked, freeing up the <Earth Jotun>. Using the door behind him, the group will be teleported to the access point to the second garden.
Sylfaen Garden[]
The first save point will be activated after fighting though a couple of mobs. Groups will be able to automatically teleport from the Advance Unit Refuge to this point from now on.
The party will then be able to proceed to the Sylfaen Garden Entrance (the second garden), where they will meet the <Earth Jotun> again, this time, fighting the <Fighting Sun Jotun>. Interacting with the <Earth Jotun> will allow the group to aid him against his corrupted comrade. Turn right and break down the door, either defeating the monsters while heading down the ramp or running past them. The windstream will bring players to the Library Gap, connecting to the Corrupt Library.
The contaminated library is a full-flight area, and the bottom of the floor is covered in a vile substance which will deal damage on those who stand on it. From here the group may head to Vid's Secret Library and fight the second boss, the <Fallen Sea Jotun>.
Vid's Secret Library[]
The fight will begin as soon as the group zones in. Through the first stage, the <Fallen Sea Jotun> will use ![]() <Force of Waves> (a small AoE which will inflict damage),
<Force of Waves> (a small AoE which will inflict damage), ![]() <Tsunami> (a frontal fan shaped AoE which will reduce movement speed),
<Tsunami> (a frontal fan shaped AoE which will reduce movement speed), ![]() <Detaining Sphere> (all-room-wide Aether's Hold state, followed by
<Detaining Sphere> (all-room-wide Aether's Hold state, followed by ![]() <Cyclone>) and
<Cyclone>) and ![]() <Concussive Wave> (an AoE stun).
<Concussive Wave> (an AoE stun).
He will summon <Jotun Grunts> to aid him, but they can be safely ignored. They will however use ![]() <Solid Strike> (a single target attack) and
<Solid Strike> (a single target attack) and ![]() <Cursed Wave> (putting a target into a silenced and bound state). If players wish to avoid being affected by these skills, avoid directly attacking them due to how extremely resilient these mobs are. They can be disposed of by forcing them to stand on the circles summoned on the ground by the <Fallen Sea Jotun> when using
<Cursed Wave> (putting a target into a silenced and bound state). If players wish to avoid being affected by these skills, avoid directly attacking them due to how extremely resilient these mobs are. They can be disposed of by forcing them to stand on the circles summoned on the ground by the <Fallen Sea Jotun> when using ![]() <Steaming Geyser>. Avoid remaining too long on them, as their damage is rather dangerous.
<Steaming Geyser>. Avoid remaining too long on them, as their damage is rather dangerous.
Leaving Vid's Secret Library will teleport players in the Storm Cliff, a small side corridor annex to the main libraries. From here the group can follow the path to reach the windstream leading to the next section of the instance; the Core of Knowledge.
Core of Knowledge[]
When the Central Entrance is accessed, players will find another teleport stone which will be activated. Quest NPCs are also located here. Ahead, Elyos and Asmodian guards will be fighting each other and can be safely ignored in order to proceed forward to the Memorial Path. Purple smoke clouds will begin to follow players around. They cannot be avoided or warded off, and whenever they reach a target which is hostile to the party, the target will receive the ![]() <Typhon's Dominating Gaze> buff, boosting their offensive stats.
Moving to the Advance Unit Assembly Area, the group will meet <Agent ViolaViola> (E)/<Agent PeregrinePeregrine> (A) again, preparing for the final battle in the instance against the source of all corruption; <Typhon>. Making use of the teleporter, players will be transported to the Spring of Knowledge, giving a start to the boss encounter immediately.
<Typhon's Dominating Gaze> buff, boosting their offensive stats.
Moving to the Advance Unit Assembly Area, the group will meet <Agent ViolaViola> (E)/<Agent PeregrinePeregrine> (A) again, preparing for the final battle in the instance against the source of all corruption; <Typhon>. Making use of the teleporter, players will be transported to the Spring of Knowledge, giving a start to the boss encounter immediately.
Spring of Knowledge[]
The fight is composed of two phases. During the first one, all group members will receive the ![]() <Grounded> debuff, disabling them from flying. It is important to note that if the whole group gets killed, the fight will restart all the way back to the beginning.
<Grounded> debuff, disabling them from flying. It is important to note that if the whole group gets killed, the fight will restart all the way back to the beginning.
The first phase is composed of <Fiery Typhon>, with fire-damage attacks, and <Vile Typhon>, with poison-based attacks. The objective is to defeat both of them within a 10 seconds window. If the attempt fails, the fight will start over, and the defeated snake will rise back up with full health. The strategy is to assign one player to one snake, with the third player healing or assisting either player where needed. <Fiery Typhon'sFiery Typhon> normal skills include ![]() <Powerful Strike> (a single target attack) and
<Powerful Strike> (a single target attack) and ![]() <Breath of Annihilation> (inflicting damage on targets within a line), while <Vile Typhon'sVile Typhon> will be
<Breath of Annihilation> (inflicting damage on targets within a line), while <Vile Typhon'sVile Typhon> will be ![]() <Acrid Poison> (single target) and
<Acrid Poison> (single target) and ![]() <Diseased Mists> (line attack).
<Diseased Mists> (line attack).
Special Mechanic
Their most crucial skills however are the red circles summoned by <Fiery Typhon'sFiery Typhon> ![]() <Fire of Calamity> (casting this skill on a target, the section he is standing on will be covered by a red circle, inflicting damage on whoever stands on them). As for <Vile Typhon>, it will use
<Fire of Calamity> (casting this skill on a target, the section he is standing on will be covered by a red circle, inflicting damage on whoever stands on them). As for <Vile Typhon>, it will use ![]() <Strange Poison Barb> (a delayed effect attack, spawning a green circle around them, showing that any other person standing on it when the effect goes off will also receive the damage),
<Strange Poison Barb> (a delayed effect attack, spawning a green circle around them, showing that any other person standing on it when the effect goes off will also receive the damage), ![]() <Potent Poison> (a debuff which will inflict ongoing damage on the affected targets for hours and cannot be removed) and
<Potent Poison> (a debuff which will inflict ongoing damage on the affected targets for hours and cannot be removed) and ![]() <Venomous Stream> (a single target attack).
<Venomous Stream> (a single target attack).
Part of the difficulty from this fight comes with these skills. However, they can be countered by certain abilities used by the opposite snake. For instance, the red circles from ![]() <Fire of Calamity> will remain and if not dealt with appropriately, they will slowly cover the whole platform. As such, the red circles can be vanished by making <Vile Typhon'sVile Typhon> target stand on them when it uses
<Fire of Calamity> will remain and if not dealt with appropriately, they will slowly cover the whole platform. As such, the red circles can be vanished by making <Vile Typhon'sVile Typhon> target stand on them when it uses ![]() <Venomous Stream>. The poison effect from
<Venomous Stream>. The poison effect from ![]() <Potent Poison> can only be removed by standing on the circles spawned from
<Potent Poison> can only be removed by standing on the circles spawned from ![]() <Fire of Calamity>.
<Fire of Calamity>.
The placement of the ![]() <Fire of Calamity> circles is crucial. The player tanking <Fiery Typhon> must keep in mind that where he stands when the cast finishes (with a one second delay) is where the centre of the circle will be. During the first phase, he should try to place them between both bosses (without disturbing the player tanking <Vile Typhon>) or a bit more to the back left, stacking them up to two on top of each other.
<Fire of Calamity> circles is crucial. The player tanking <Fiery Typhon> must keep in mind that where he stands when the cast finishes (with a one second delay) is where the centre of the circle will be. During the first phase, he should try to place them between both bosses (without disturbing the player tanking <Vile Typhon>) or a bit more to the back left, stacking them up to two on top of each other.
With both snakes defeated the ![]() <Grounded> debuff will be lifted. Players should spread their wings to avoid the clouds of smoke that will cover the platform, as they will easily kill anyone that stands at them. <Typhon> will appear and must be fought while in the air, at a sufficient altitude. This phase is easy, as <Typhon> will just stick to using
<Grounded> debuff will be lifted. Players should spread their wings to avoid the clouds of smoke that will cover the platform, as they will easily kill anyone that stands at them. <Typhon> will appear and must be fought while in the air, at a sufficient altitude. This phase is easy, as <Typhon> will just stick to using ![]() <Last Breath> (a frontal AoE) and
<Last Breath> (a frontal AoE) and ![]() <Strange Poison Barb>.
<Strange Poison Barb>.
Once <Typhon> is defeated, the fight will finally end, allowing players to loot his corpse for loot. The exit and <Agent ViolaViola> (E)/<Agent PeregrinePeregrine> (A) will also appear, marking the end of the instance.
Quests[]
Once the campaign versions of the quest are completed, the repeatable version will be unlocked. The standard version is automatically acquired inside the instance as the player steps in to the appropriate section. All quests within this instance can be turned in through the Bounty feature.
- Elyos
 [Instanced Dungeon/Group] Urgent Summons [?]
- [Instanced Dungeon/Group] Lost Agent Viola [?]
- [Instanced Dungeon/Group] Traveling with the Earth Jotun [?]
- [Instanced Dungeon/Group] Reunion with Agent Viola [?]
- [Instanced Dungeon/Group] Insightful Eye [?]
- [Instanced Dungeon/Group] Escape from the Contaminated Library [?]
- [Instanced Dungeon/Group] Evil Spirit Typhon [?]
- Asmodians
- [Instanced Dungeon/Group] Urgent Call [?]
- [Instanced Dungeon/Group] Lost Agent Peregrine [?]
- [Instanced Dungeon/Group] Traveling Companion Earth Jotun [?]
- [Instanced Dungeon/Group] Reunion with Agent Peregrine [?]
- [Instanced Dungeon/Group] Eye of the Ruler [?]
- [Instanced Dungeon/Group] How to get to the Storm Cliff [?]
- [Instanced Dungeon/Group] Ruler Typhon [?]
Rewards[]
| Boss | Drops |
|---|---|
| <Insightful Eye> |
|
| <Fallen Sea Jotun> | |
| <Typhon> |
Gallery[]
")
")
")
")
")
")
Trivia[]
- This instance was originally introduced as 6-player group instance for level 66+ players. It was accessible from the Reflection of Eternity pillar within the Tower of Eternity, as well as the Archive of All Knowledge in the Archives of Eternity once the final boss has been defeated.
- This original version of the instance had a lot of side quests and optional areas, which either held treasure chests or were used to unlock double loot from the instance's bosses. In the 6.0 version all these areas were removed, leaving on a straightforward path for the player to follow.
- Bandits of Greed would sometimes appear in this instance. They spawned down the ramp from the Advance Unit Refuge (starting area).
- With the 6.0 update this instance was adjusted into a shortened, 3-player version of the original, designed for level 76+ players. It could since be accessed from the Lebu Forest ( Elyos) and the Mysterious Mushroom Dwelling ( Asmodian) in Lakrum. Throughout the 6.0 update this instance was a viable source for Ancient gear and enchantment stones, as well as several other rewards, and was thus frequently ran by (new) players.
Others
- This instance is composed of five different layers; one for each boss room, the main gardens and the Core of Knowledge.
- Three main Jotun tenders are portrayed, each of them representing an element crucial to make a plant grow. They are the <Earth Jotun> (soil), the <Sun JotunFighting Sun Jotun> (energy) and the <Sea JotunFallen Sea Jotun> (water). As tenders of the gardens, their original task was to look after the All-Knowing Tree in the Core of Knowledge.
- Originally players were required to complete the final campaign in Archives of Eternity in order to access this instance, as well as having finished the final campaign in Cradle of Eternity in order to enter Trials of Eternity. These requirement were lifted shortly after the 5.6 update.
- <Typhon> (based on his original name) is based on the Greek mythological creature Python. This creature guarded an artifact of great importance until it was slain by Apollo.
- While the name was changed to "Typhon" for the western release, it keeps the reference to the original meaning, as Typhon is said to share origins with Python.
- Ironically, the instance's former armor set would be called "Apollon's", named after the deity that killed Python.
- The purple clouds in the Core of Knowledge cannot be attacked or targeted, however they can be CCed through AoEs.
- The instance is referred to as "ideternity_02" in files.
- The instance has been nerfed overtime.
- <Fiery Typhon> and <Vile Typhon> would recover HP overtime due to <Eternal Bounty>.
- <Fiery Typhon> would summon Explosive Zygotes, which would explode soon afterwards.
- The final fight against <Typhon> would originally consist of three phases. The first and third one would be similar to the current instance. The second one would involve fighting all three Typhon variants at the same time, borrowing aspects of the first phase (such as taking down <Fiery Typhon> and <Vile Typhon> in the same way) with the added difficulty of having <Typhon> throwing all-room-wide effects.
- <Fiery Typhon> and <Vile Typhon> would recover HP overtime due to